Modifications Page One. On this page :
Modern electrical controls and levers.
Sunbeam to Burman kickstart modification.
Top bracket assembly with tongue.
Childslicer.
Modern Electrical Controls and Levers.
I required twin handlebar mirrors for British and French roads. I also needed to control the lights from the riding position.The left hand handlebar switch is an American product available from a British company called ORO2U.
( see my list of recommened suppliers ).The functions are lights off, lights on dipped and main beam ( a blue LED illuminates on the switch top ) , left/right turn switch and horn push. The Japanese style brake and clutch levers were supplied by Vehicle Wiring Products as were the component parts for the control cables which I make up myself. These levers have standard 10 mm mirror bosses. I used pattern Suzuki style mirrors. These are screwed into Suzuki GT750 anti vibration mirror mounts, these are available from any Suzuki dealer ( they work really well ). I also mounted a digital voltmeter in the centre of the handlebar as I needed to know the dynamo and battery state from the riding position.
I replaced the ignition switch with a modern two position ON/OFF unit. The redundant ammeter was removed and a blank installed with a USB port to charge my mobile phone.
Sunbeam to Burman Kickstart Modification.
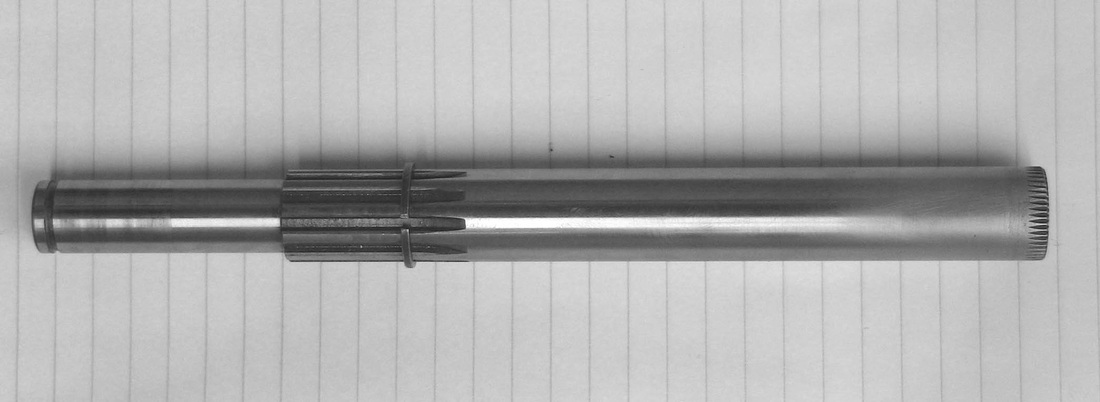
If the splines are badly worn on the Sunbeam kickstarter pedal and shaft ( see first picture below ) well here is my solution to the problem. The Burman heavyweight gearbox ( BAP type ) which was installed on many British motorbikes has a kickstarter shaft which is easily modified to fit on the Sunbeam kickstarter shaft. The Burman kickstarter spline is slightly smaller than the Sunbeam shaft so there is no problem with the oilseal in the gearbox case. Burman kickstarter shafts and pedals are frequently advertised both new and used on various web auction sites.
The offset or bend in the Burman pedal needs to be 2.. 5 inches to clear the large S8 silencer. The most common pedal that has this offset is used on big singles such as Panther and Matchless.
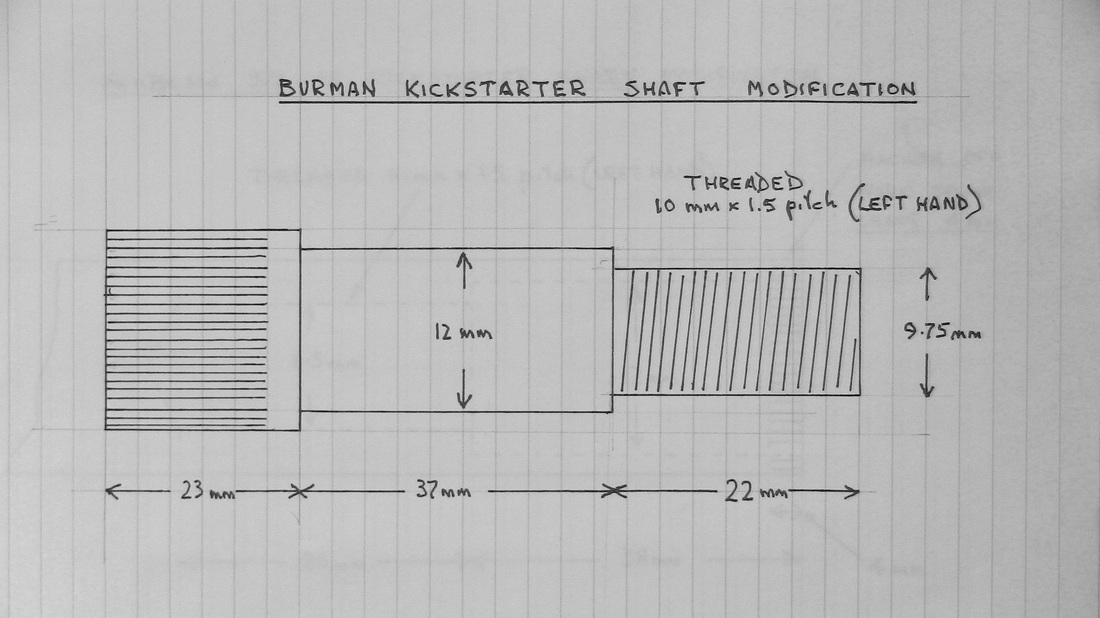
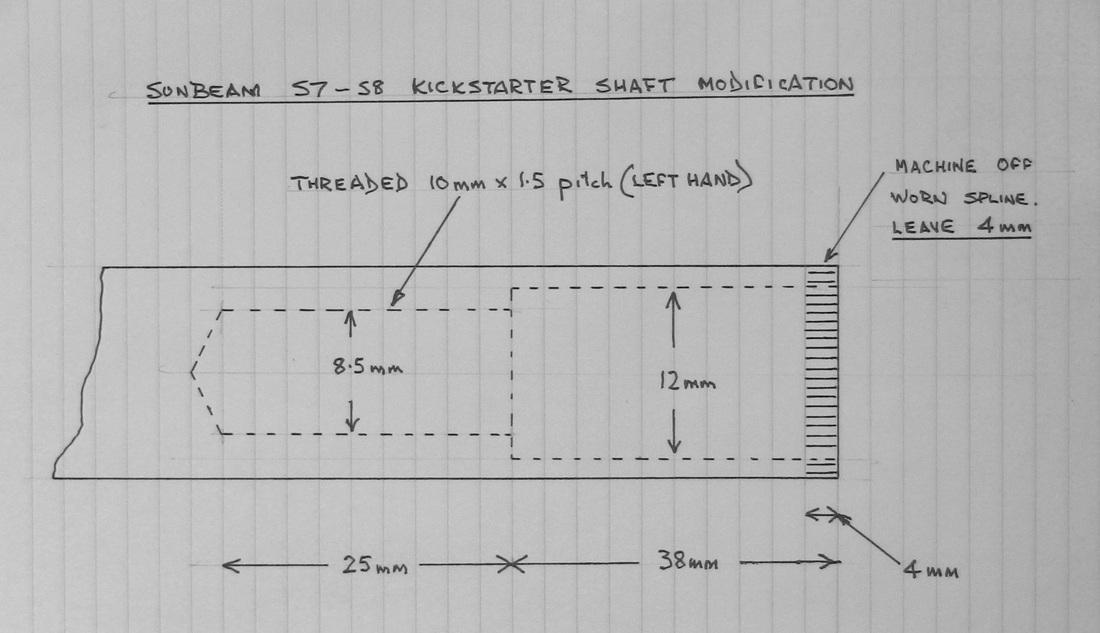
However if a pedal has less than adequate clearance a local garage with oxy-acetylene equipment can alter the offset.The threads used in this modification are 10 millimetres by 1.5 pitch left hand.
Left hand taps and dies are readily available at no extra cost over standard tooling. ( Available from RDG Tooling )
The shafts are case hardened so when cutting on the lathe take small cuts, once this has been cut through the steel is easily machined, thread cutting should be well lubricated and not rushed. Once the two parts have been screwed together the repair will last a lifetime. Very little strain is put on the parts due to the very low gearing of the kickstarter.
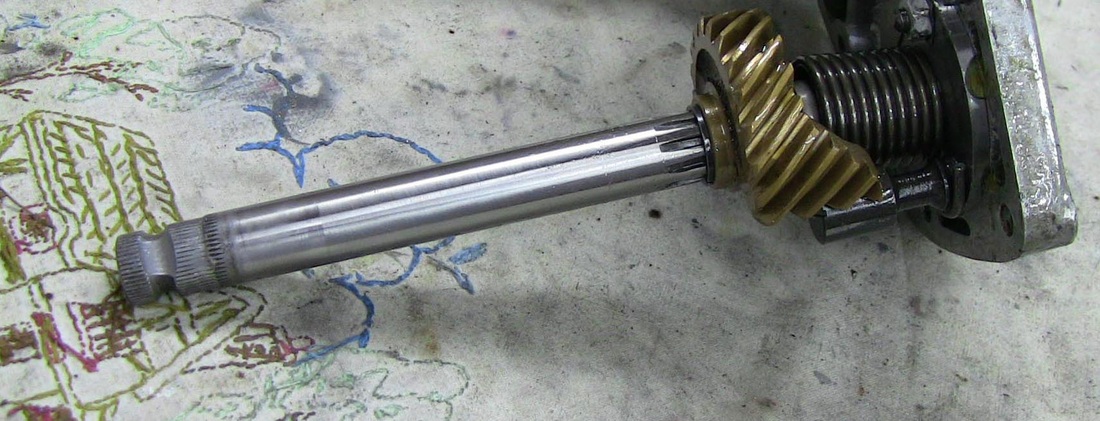
Damaged splines.

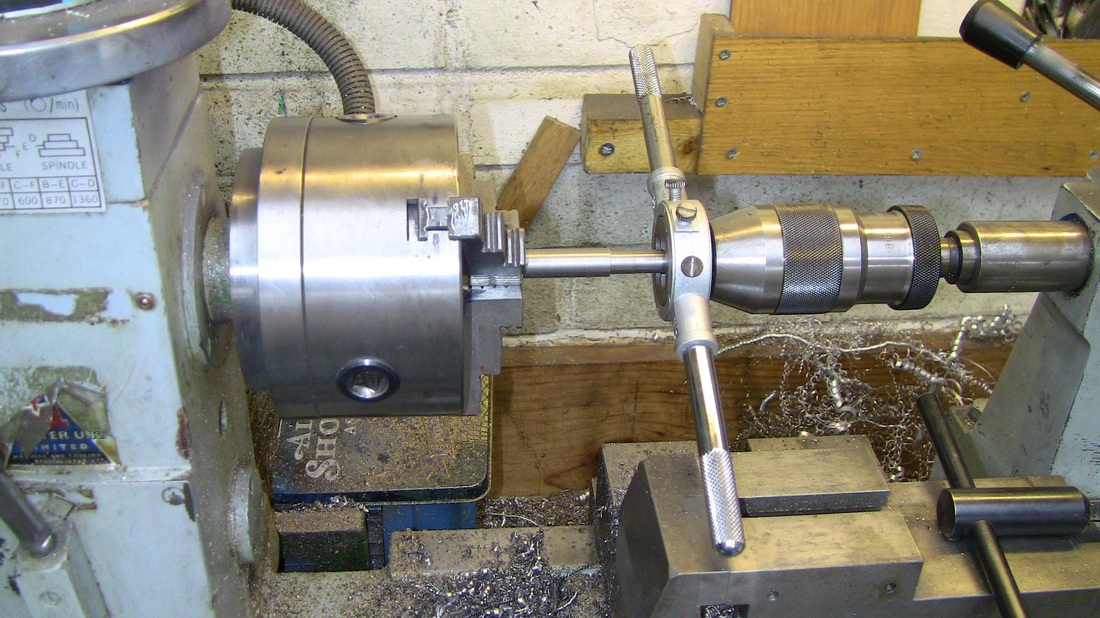
Threading the Burman shaft
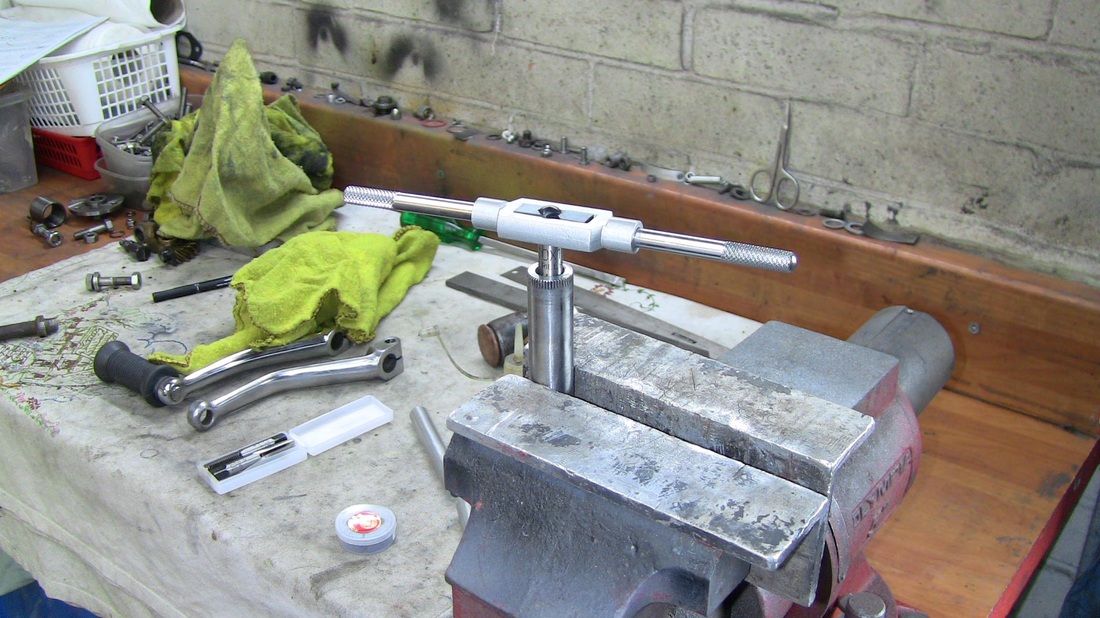
Threading the Sunbeam shaft
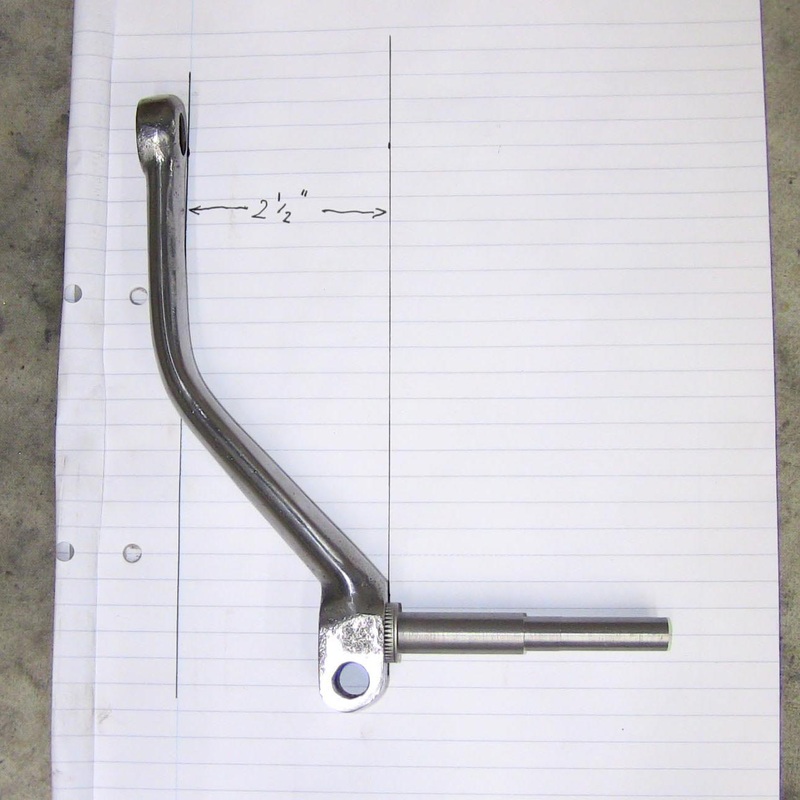
Showing the required offset with the modified Burman shaft.
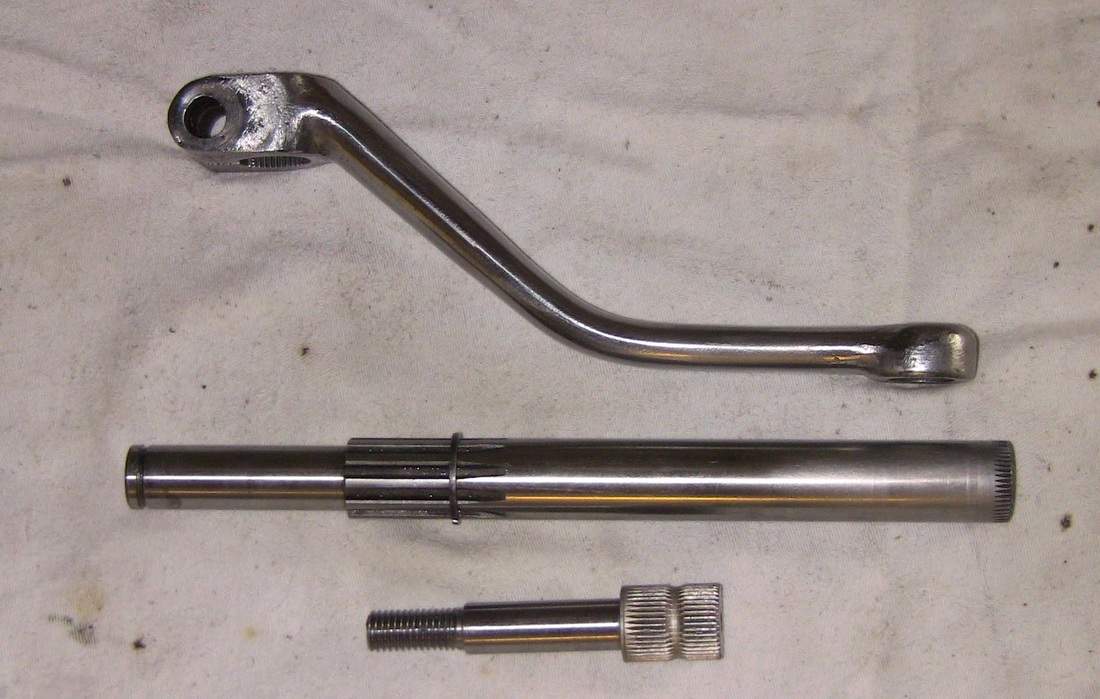
The component parts.
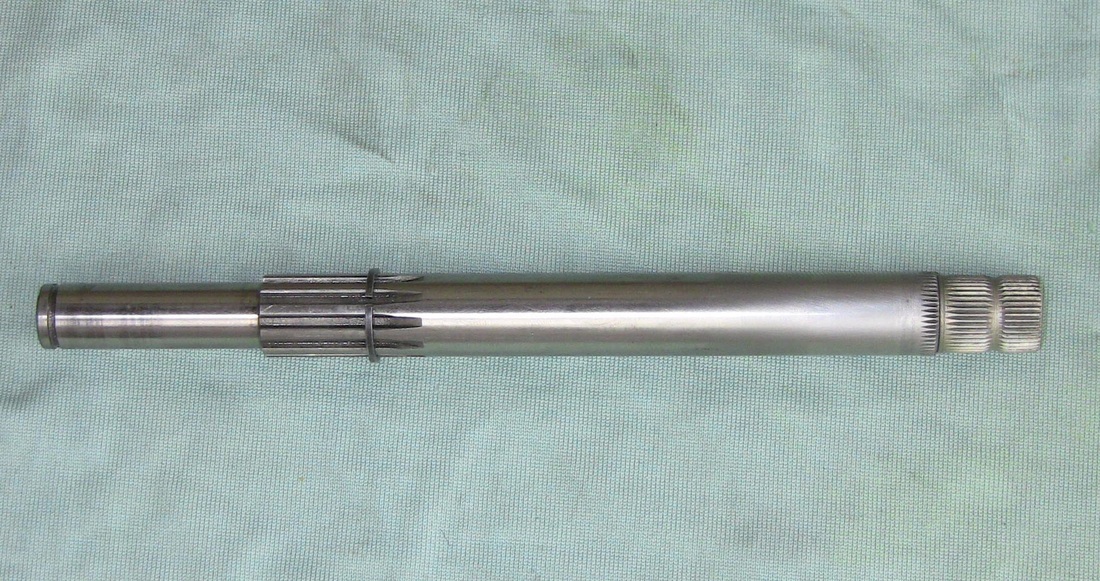
The completed shaft.
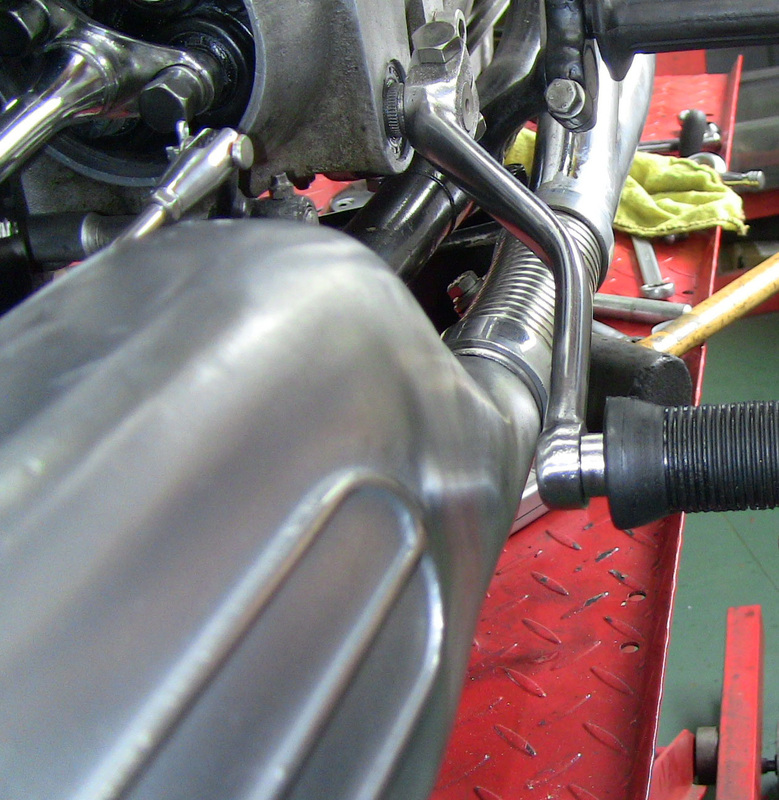
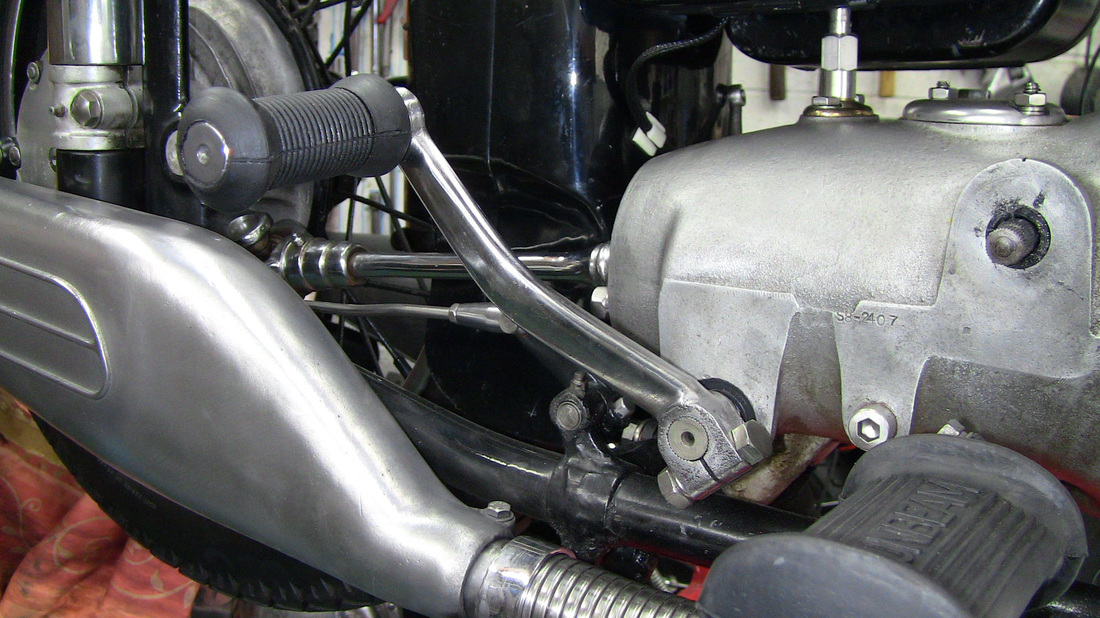
Kickstart clearance.
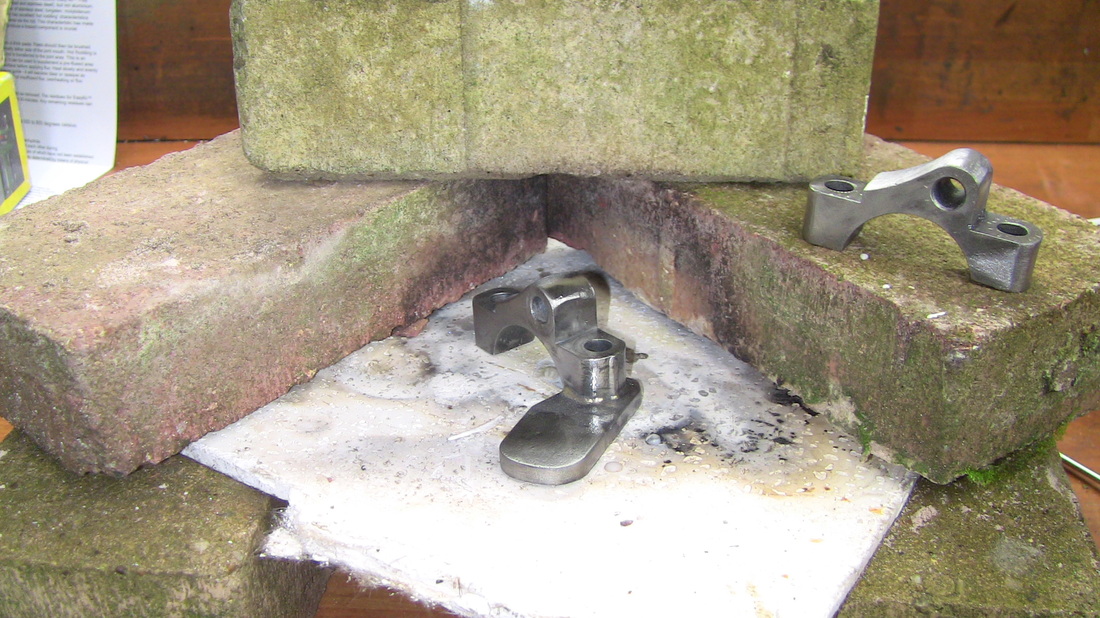
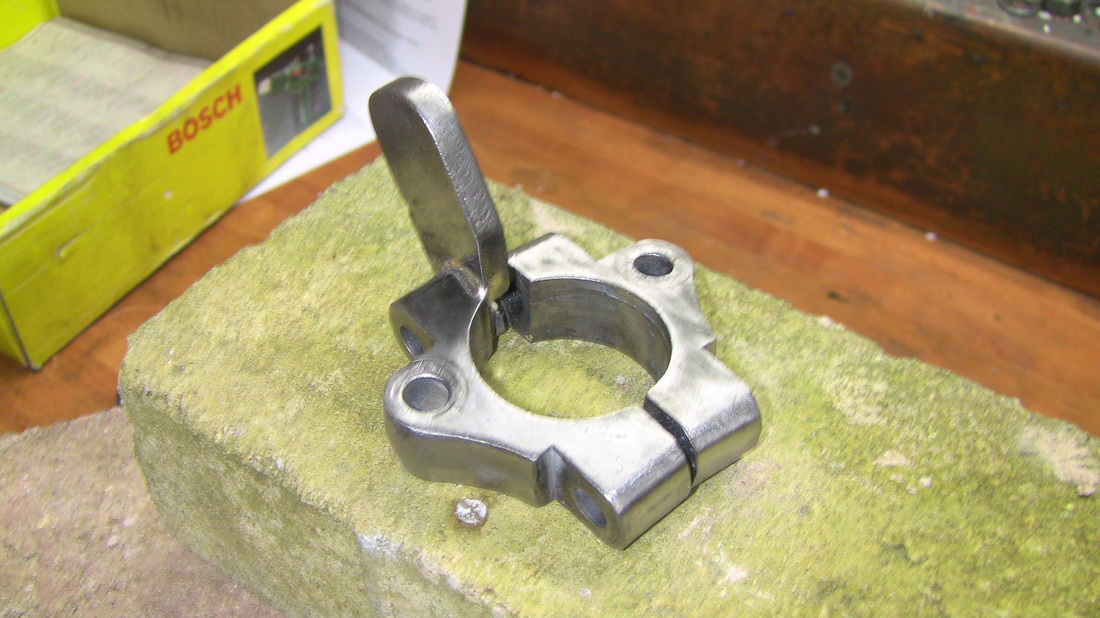
Top bracket assembly with tongue.
When it comes to assembling the top bracket and setting the 'tongue' central on the top snubbers if the 'tongue' is brazed to one of the top brackets then assembly and setting is much more accurate. Shown below is the setup I used to carry out the work. Because the job was small the bricks are ordinary housebricks, the fireproof board was a piece of insulating material from my old boiler ( not asbestos ). I first heated up the job and the bricks with an electric heat gun as hot as possible. This saved on the propane in the gas torch that finished the job. The flux used was Borax powder mixed with a little water to make a paste. I purchased a couple of brass brazing rods and the Borax for a couple of pounds on that well known web auction site.
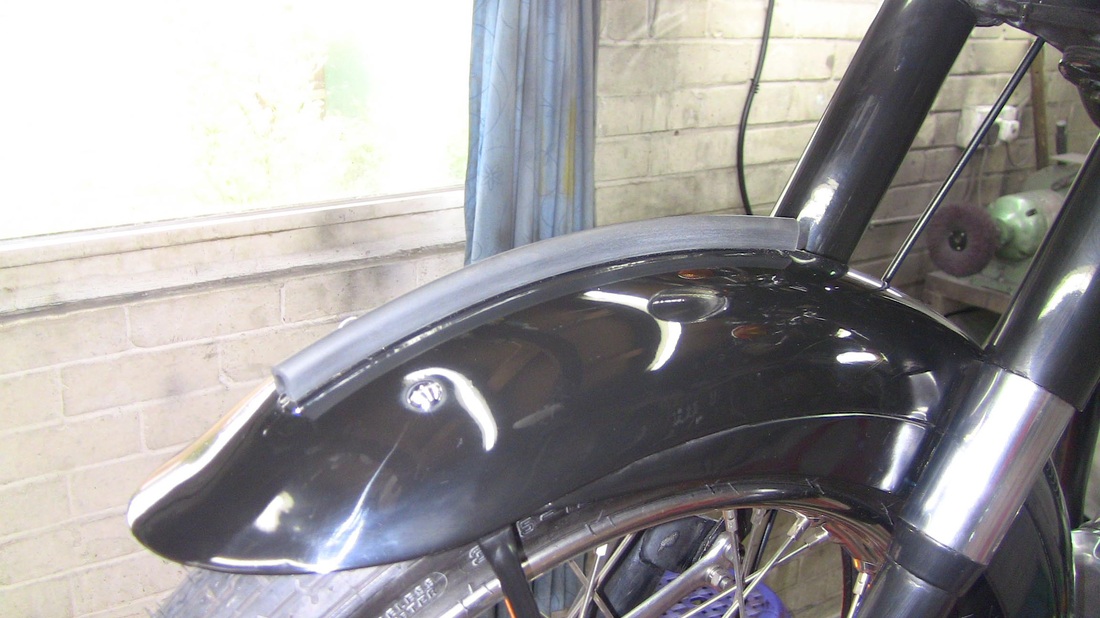
Childslicer
I never liked front number plates. The Sunbeam S8 front mudguard fixing rails for the number plate are spot welded on. I covered mine with a piece of rubber edging trim.